From NeOn Wiki
Oyster-GUI
Contents |
Functional Description: What does it do?
The Neon Toolkit Oyster GUI is an interface integrated into the NeOn Toolkit to ease access to Oyster servers. These servers act as repositories of OMV instances, thus allowing to store and manage metadata about ontologies and related concepts.
Main Features:
- Submit new OMV instances to an Oyster server.
- Update already existing OMV instances at an Oyster server.
- Remove OMV instances from an Oyster server.
- Import ontologies which metadata is retrieved from an Oyster server.
- Look for OMV instances in an Oyster server.
User Documentation
Server selection
The NeOn Toolkit Oyster GUI connects to a server to perform almost any operation. These are submit metadata, update metadata, delete metadata and query for instances of omv classes.
When performing any operation that needs to connect to a server, there will be always the chance to select it, or to edit the list of servers. This page presents two examples, and the same composites are used for every feature, so it's always the same.
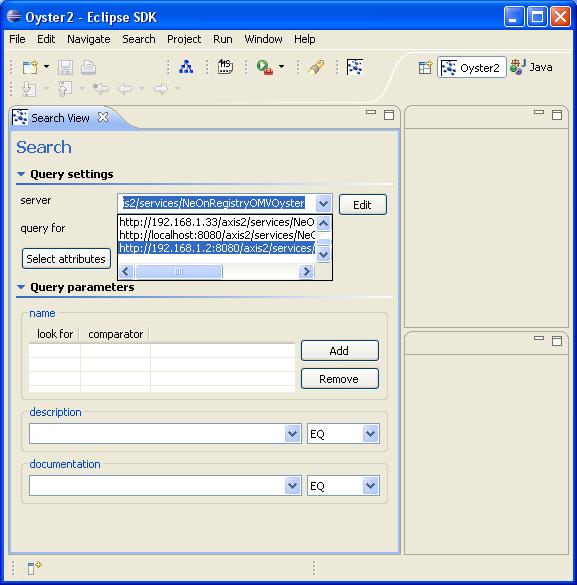
There will be always a combo holding the list of known servers, like this one:
Server selection combo
To select the server just click on it and a complete list of all known servers will be shown.
Server list shown by the server selection combo
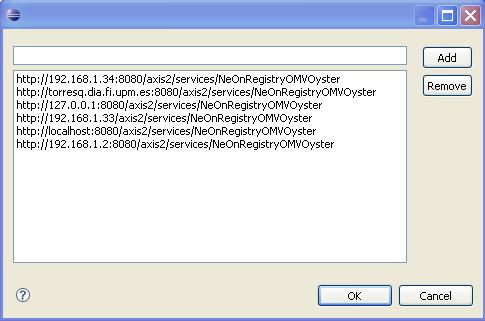
At any time when the server selection combo is displayed, there will be also an edit button, to let you change the known servers list. Clicking on it will show the following dialog:
Server list edition dialog
This dialog lets the user type a new URL in the text box (in the top of the dialog) and add it to the list using the add button, and select a server of the list and remove it using the remove button.
Searching OMV Instances
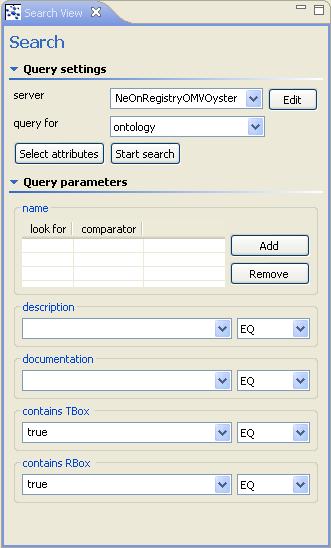
The search feature can be used from the Oyster perspective, using the search view. It will make use of at least another view (the search results view), so although it's possible to open the search view from any perspective it's recommended to use it while in the Oyster perspective, to avoid cluttering the NeOn Toolkit interface with too many views.
The search view has to sections:
- The configuration section. This section allows the user to select the target server that will receive the queries, the omv class which instances you are looking for, and select the attributes used to perform the query
- The parameters section. This section is meant to receive the query parameters. These parameters are property values that must be present in the instances returned by the query.
The search view
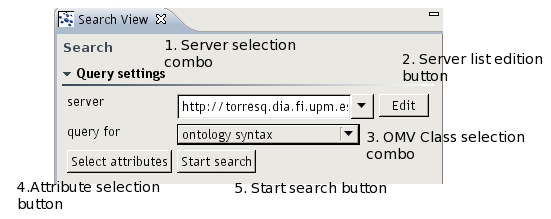
The configuration section
The configuration section
As it was said earlier, here are the following controls:
- Server selection combo (see server selection).
- Server selection list edition button.
- OMV class selection combo. It allows to select the class of the instances to be looked for .
- Attribute selection button. This allows to select which attributes from the OMV class are to be used in the query.
- Start button. This starts the search with the given query parameters.
Selecting query parameters
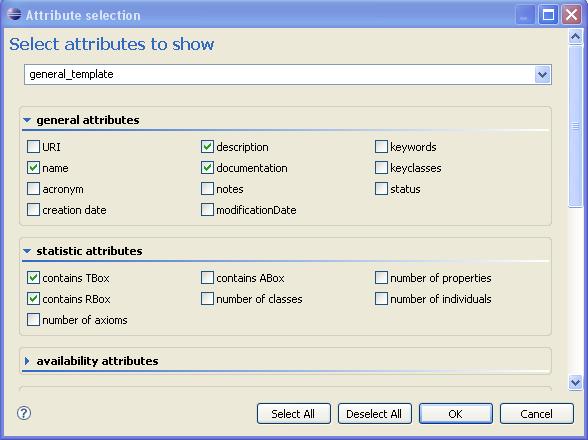
Once the omv class is selected, the "select attributes" button will show a list of the attributes of the selected class.
Properties selection dialog
The main controls of the attribute selection dialog are:
- Template selection combo. Lets the user select between a predefined list of templates. Selecting a template will check the attributes of the template, and uncheck others.
- Select all and Deselect all buttons. They mark every property as selected or clears the selection, respectively.
- The attributes section. Lets the user check or uncheck properties individually.
Once the property selection has been changed by pressing the "Ok" button in the attribute selection dialog, the changes will be reflected instantly in the fields section of the search view.
The fields section
Within the fields section are located the different input controls to allow the user specify query parameters. Depending on the type of parameter there will be a different control, with it's own way of accepting such parameters. Here is an enumeration of the controls that may appear:
- The combo input field. It is used for parameters that will accept a single string or boolean value. The combo will hold values used in previous queries if it needs a string value, or the values "true" and "false" for boolean parameters. It has also a combo to let the user specify the comparator of the parameter.
The combo input field
- The table input field. This control is used when the parameter accepts multiple values. In this cases, the matching results will have all values in the property. To add a value it's necessary to use first the "Add" button, and then edit the inserted row, which has two fields, a string one for the value, and a combo for the filter type.
The table input field
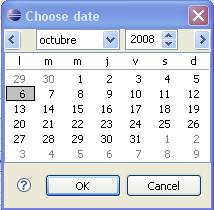
- The date input field. Similar to the combo field, it has a button which will bring up a dialog to select a date. It's heavily recommended to use the dialog instead of typing the date directly, due to the fact that the server will accept only a particular date format, and the user may type it wrongly.
The creation date combo
The date selection dialog
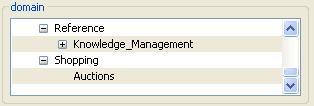
- The domain field. Since the URI of a DMOZ topic is rather long, there is a control dedicated to this kind of input. It shows the hierarchy of DMOZ topics (in fact, it shows only their labels to the user), and lets the user select any number of them (holding the SHIFT key).
The domain input control
The search results view
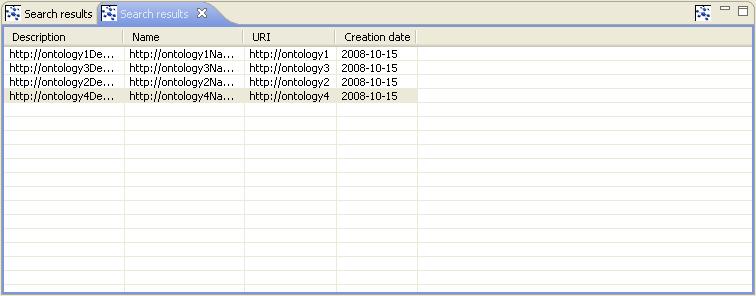
When the results are returned they are shown in the Search Results View. If there are no results at all, it will only display a message saying that no results were found. On the other hand, if there are any results, they will be displayed in a table, where each row is an instance of the class, and each column a property.
The search results view
Once the results are shown, the user may take any of the following actions:
- See the details of any instance on another view. If the user clicks twice on any result other view will show RDF text describing the selected result.
- In the context menu (brought up by using the right mouse button over any result) the user may choose to update it.
- The user may also select to delete the selected result.
- When the results are ontologies, the context menu allows the user to import an ontology into an existing project.
The import feature
The NeOn Toolkit Oyster GUI is able to import ontologies into NeOn Projects. To do so, these must be in the lists of results obtained from an Oyster server, and the project must already exist. The other requisite is that the ontologies must be accessible by http or ftp protocols. The first step is to make a search that will return ontologies. Once the list of ontologies is shown, the user can choose to import any one of them. To do so, select a result and use the right button of the mouse to bring up the context menu where it will allow you to choose to download an ontology.
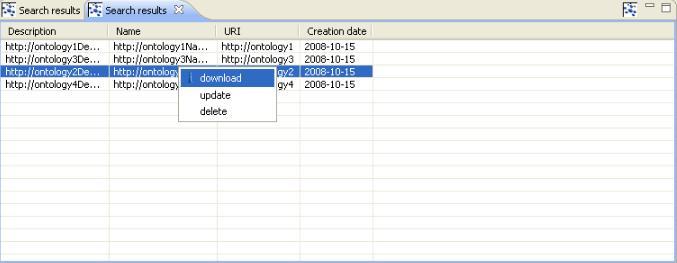
The import ontology entry in the context menu
Once you have done so, a new dialog will appear. It will show the selected ontologies that are about to be imported, and a list of existing projects. At this point the only choice is to select the project where the ontology will get imported into. All ontologies in the dialog will be imported, regardless of the selection of them the user makes here (thus the user must be careful selecting from the results view).
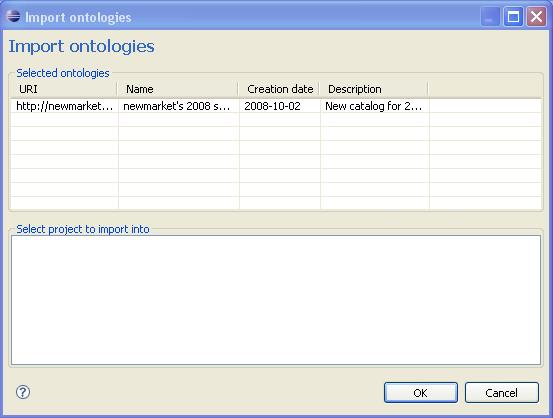
The import ontology dialog
When the user presses the OK button the importation process begins. Bear in mind it may take a while, since the ontologies must be get from web and ftp servers, which in turn may be busy or even not working anymore.
The submit metadata feature
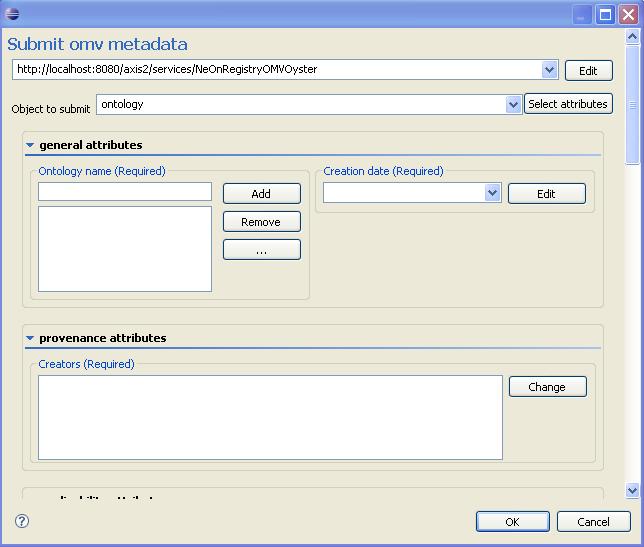
The NeOn Toolkit Oyster plugin comes with the capability of submitting new instances of omv classes to an Oyster server. This feature is always accessible through a button on the toolbar, as depicted in the following picture:
Toolbar detail with the submit metadata button on the top right corner
Once the dialog has been brought up, the user has the choice to
- Select the server to receive the metadata.
- Select the class of the OMV instance that is going to be submitted.
- Select the properties that will have a value in the instance.
The submit dialog
Selecting the OMV Class
The first step is to choose the OMV Class to make the instance from. Currently almost all OMV Core classes are supported, with the exception of "Location", which is not supported by the Oyster server, thus the client does not make use of it.
Selecting the properties
OMV classes have required and optional properties, and because of that the user is not forced to supply values for every property of the class. When the user pushes the Select attributes button, a new dialog will appear, allowing the user to select which properties will get a value. On the top of this dialog there is a combo box that will let the user choose between templates, so if the class has many properties (such as Ontology) the user may start with a predefined set of properties selected. Note that there may be no more than a single template when the class has too few properties.
Providing values for the properties
Once the user has selected the properties that will have a value, he must start filling the input controls. Depending on the kind of value the property accepts, the control will be different to help the user with his task.
Here is a list of available input controls:
- Simple combo control. Used whenever the input is a free form string.
Combo input control
- Date combo control. Used for dates. It's heavily recommended to use the dialog instead of typing the date directly, due to the fact that the server will accept only a particular date format, and the user may type it wrongly.
Date input control
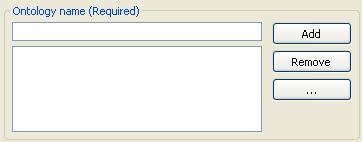
- List of strings with suggestions.
Used whenever the input is a list of free form strings, the user may type new values, and there is a list of available values that might be of interest for the user. It has a button labeled "..." to bring up a list of suggestions. Pressing the Add button will add the value in the text field to the list, and pressing the Remove button will remove selected elements from the list. Suggestions usually come from values used in previous sessions, or from a predefined set of well-known values.
Editable text list with suggestions
- List of strings. Used whenever the input is a list of free form strings, but the user must choose from a predefined list of values. Pressing the Add button will bring up a dialog with such list.
List
- Ontology domain control. Used for properties where the value will be selected from the DMOZ hierarchy. It allows the user to select multiple values from such hierarchy. Topics are shown using abbreviated forms, but the NeOn Toolkit Oyster GUI will send whole URLs to the Oyster server.
Domain input control
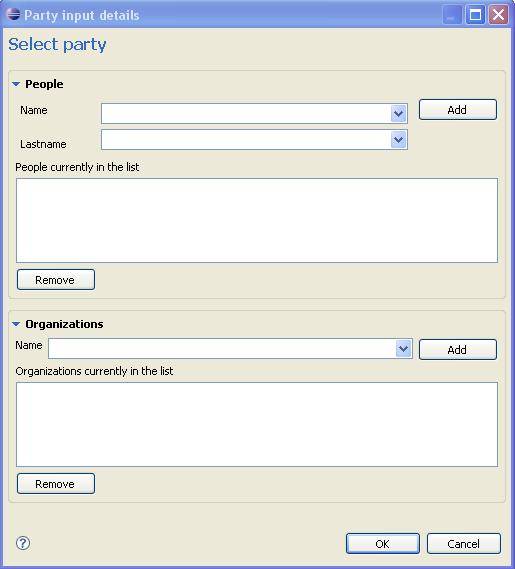
- Party input control. Used for properties where the value be a list of parties. It has a list showing current values, and an Change button lo let the user add values. Pressing the Change button will bring up a new dialog where the user will be able to specify parties as people or organizations, and remove parties from the list.
Party input control
Party edition dialog
The update metadata feature
In addition to submit metadata (OMV class instances) the user may want to update existing metadata about a concept. To do so the user must perform a search first, so the NeOn Toolkit Oyster GUI will populate the update dialog with the current property values of the instance.
The first step, assuming the user has at least a result displayed in the search
results view, is to open the context menu using the mouse right button to click
on the result to be updated. In this menu, choose the update option.
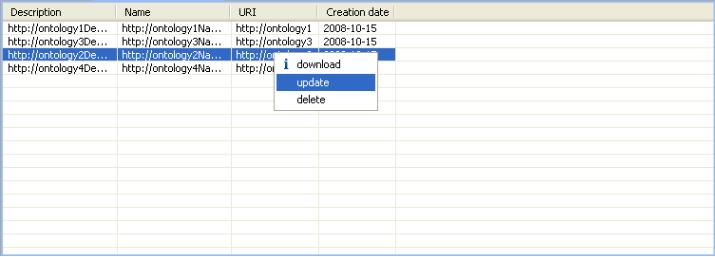
The update entry in the context menu
The dialog shown to the user is exactly the same as the one from the submit metadata feature, but values are already assigned. There are two things the user has to bear in mind regarding this dialog:
- The properties with party values are not filled. The user must provide the values
if he wants them to have any values at all. This is because the server won't specify which kind of party are the returned values, and the query for parties are not currently supported, so the NeOn Toolkit Interface has no means to know about party types.
- If the user uses the Select attributes button to hide properties, they will lose
their values in the update process, so they must not be hidden if they are to get a value or preserve it.
The controls found in this dialog are the same as in the dialog of the submit feature.
The delete metadata feature
In addition to the submit and update metadata features, the NeOn Toolkit Oyster GUI has the capability of removing metadata from the Oyster server (in other words, removing instances of OMV classes from the registry).
To remove an OMV instance, the user needs to retrieve the OMV instance to be deleted using the search feature. When the results view shows the instance the user must select it and bring up the context menu to select the delete entry.
